Overview
This is a requirement to install CrewAI Enterprise on an Azure environment that uses Microsoft Entra as the authentication provider.Installing for the first time? Use a Deployment Guide for a complete end-to-end walkthrough including infrastructure setup, a full
values.yaml, and post-install steps:Initial App Registration
Go to portal.azure.com and select “Microsoft Entra ID” under “Azure services”. In the “Overview” screen, under “Add”, click “App registration”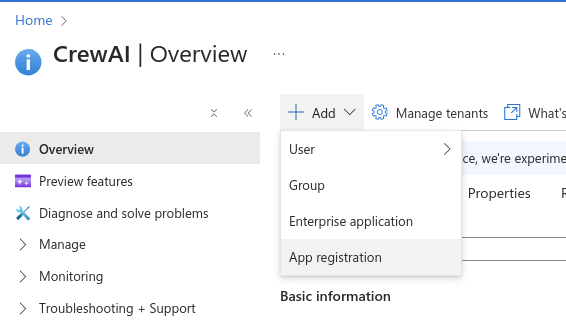
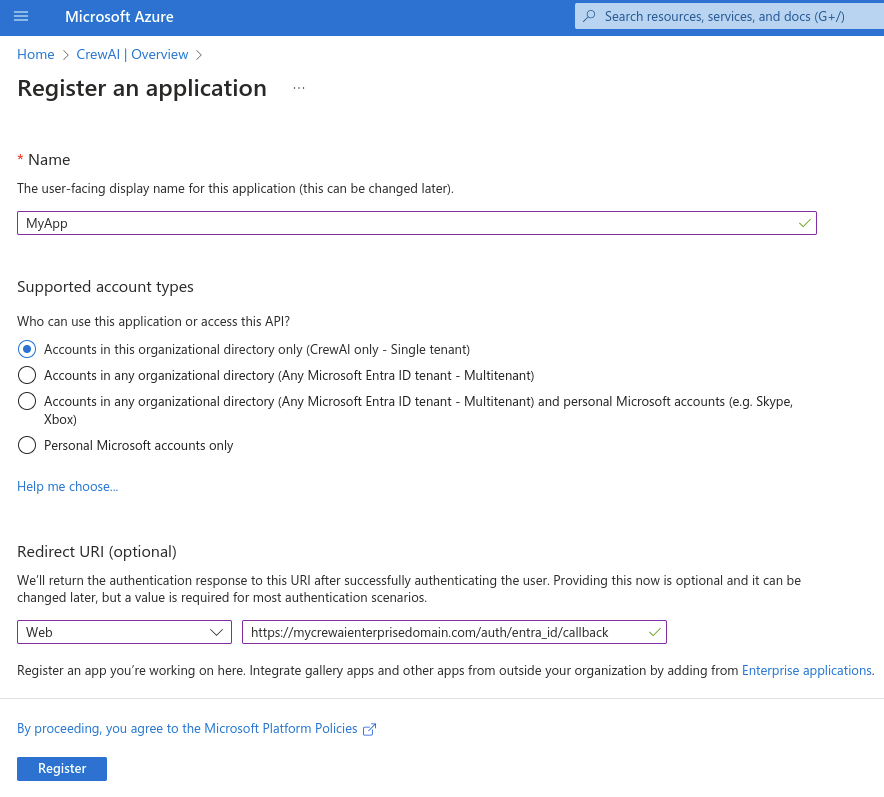
- Name: Choose a name for the application (Suggested:
CrewAI) - Under supported account types, choose “Accounts in this organization directory only”
- This will ensure that only users from this Azure organization will be able to log in into the application.
- Redirect URI
- In the “select a platform”, choose “web”
- Fill in the redirect URI with your application domain +
/auth/entra_id/callback- e.g.
https://crewai.thedomain.com/auth/entra_id/callback
- e.g.
Collecting Credentials
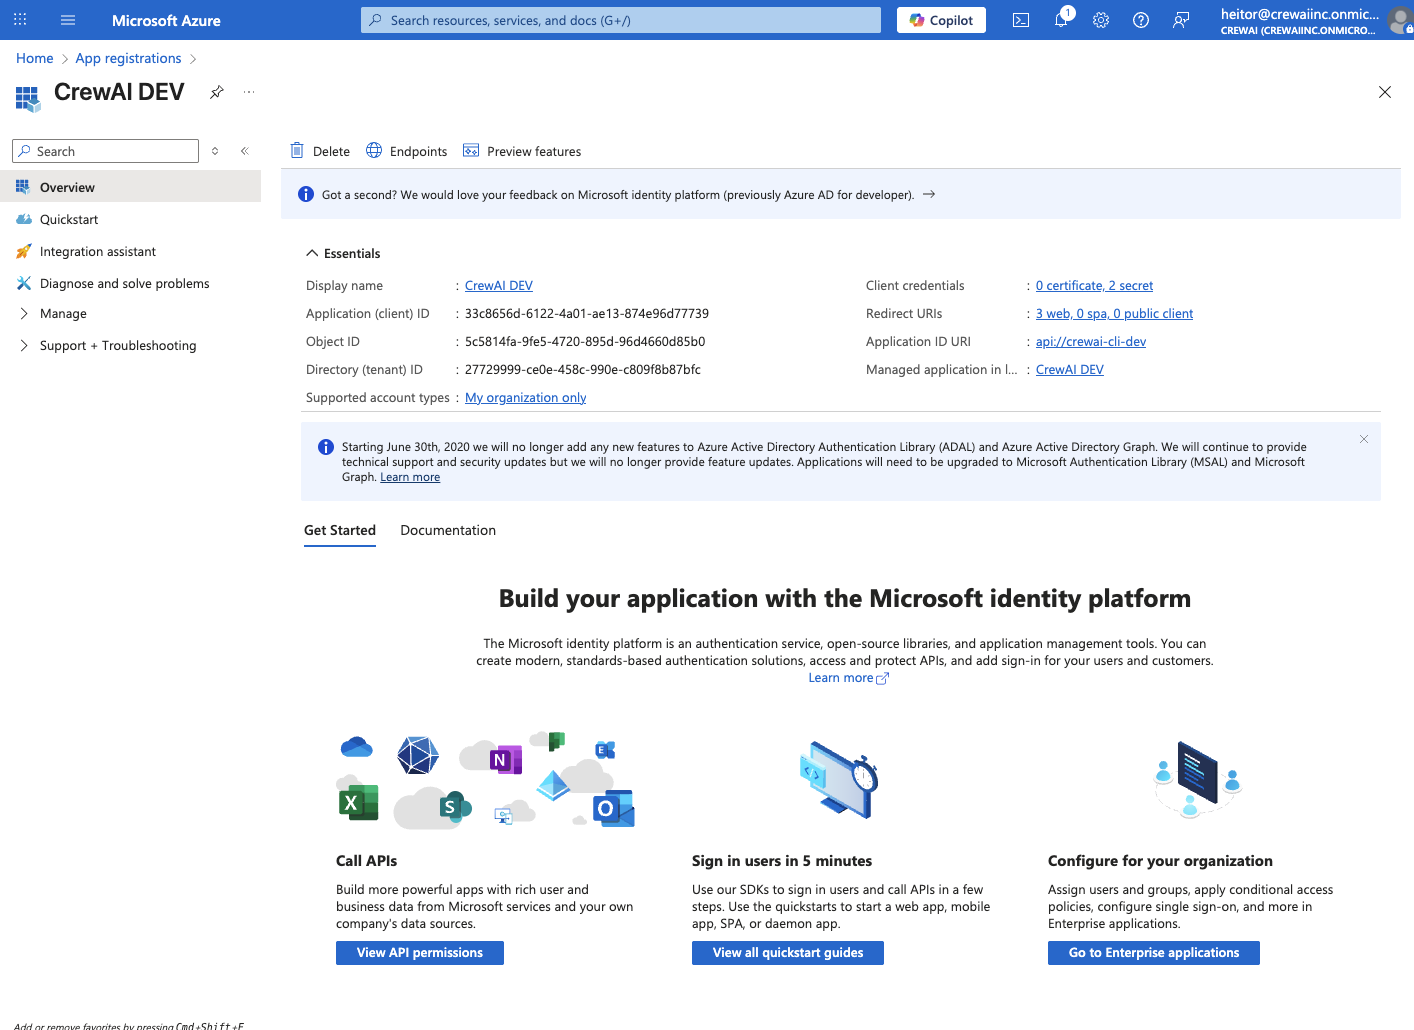
In the app details page, grab the values “Application (client) ID” and “Directory (tenant) ID”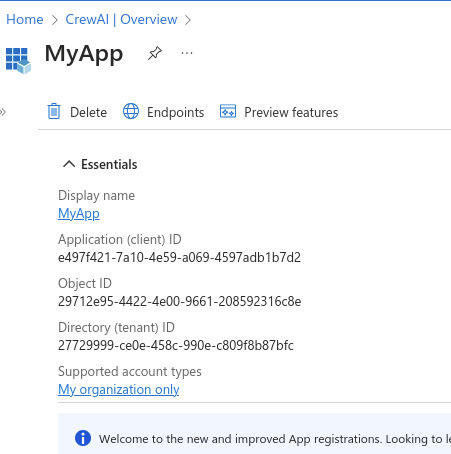
You can also access this page through the left sidebar of under “App registrations” and then clicking your app name in the list that is shown.
Creating Client Secret
On the left sidebar of the app details page, under “Manage”, access “Certificates & Secrets”, and create a new client secret. On the right panel that appears, write in the description of that secret (e.g. CrewAI Enterprise) and choose the expiration date. Click “Add” to create the secret.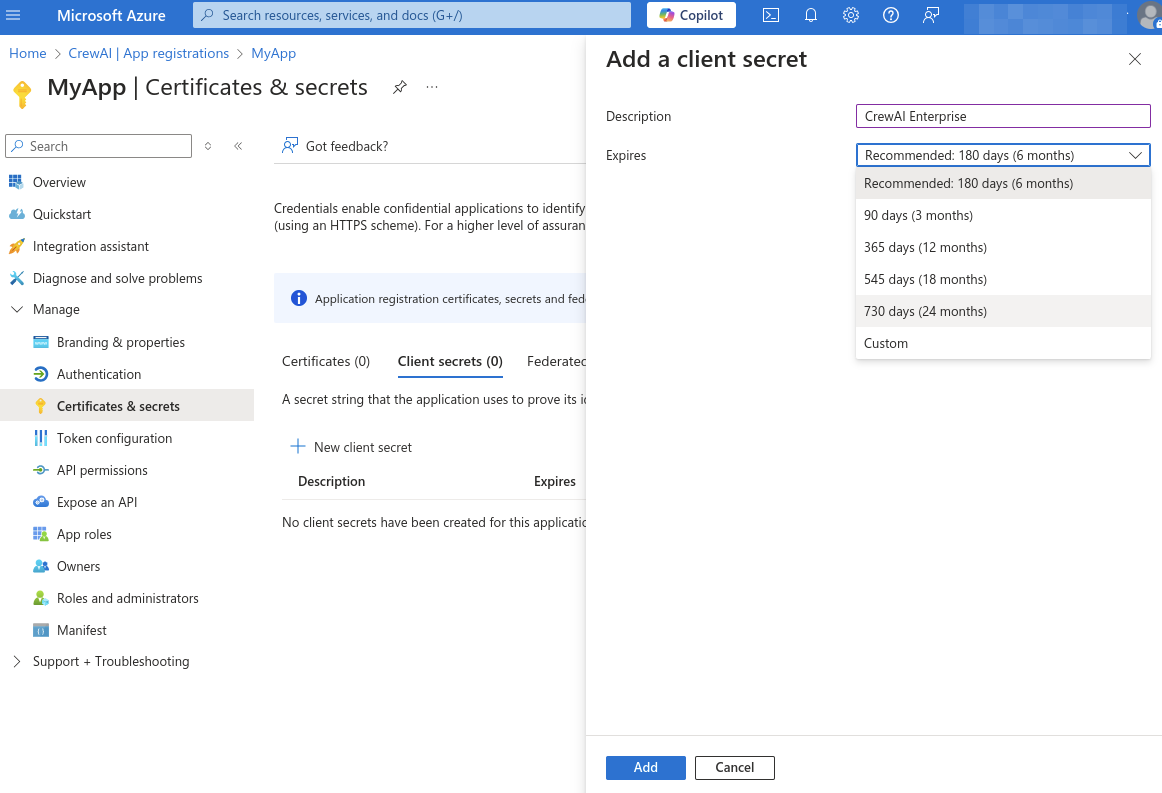

Granting Admin Consent
Go back to Azure portal, and under “Azure services”, go to “Enterprise applications”. Under “All applications”, choose the app that was just created. In the left sidebar, under “Security”, click “Permissions”. In the screen that appears, click “Grant admin consent for CrewAI”.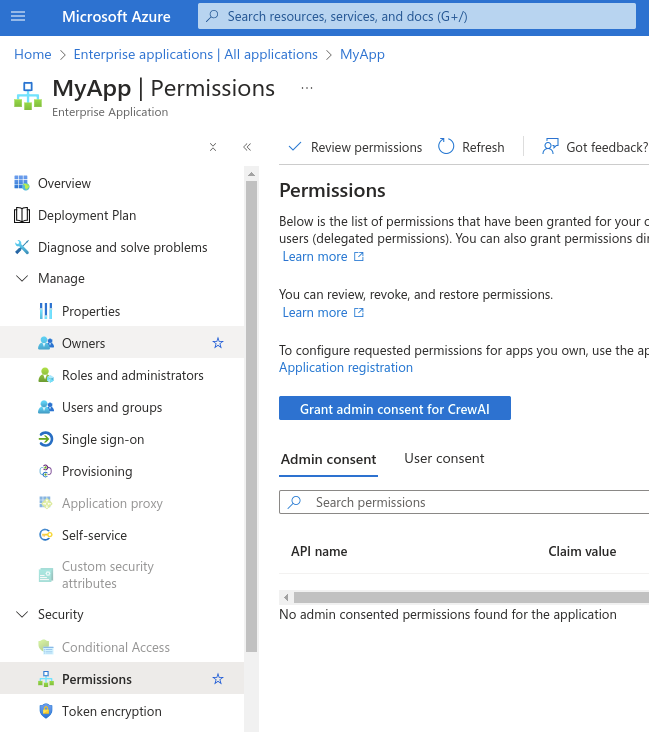
Configuring App Roles
App Roles allow Entra ID to communicate each user’s role directly to CrewAI Factory via the JWT token. This is the recommended way to grant admin panel access to Entra ID users — no additional commands are needed after login. Go back to “App registrations” and select your app. In the left sidebar, under “Manage”, click “App roles”, then “Create app role”. Create the following two roles:
For each role, ensure the “Do you want to enable this app role?” checkbox is checked before saving.
The
member role value is not checked anywhere in the app — it is purely a way to grant login access when “Assignment required” is enabled. Only factory-admin grants admin panel access.Configuring User Access
In the left sidebar, under “Manage”, go to “Properties”, and set the “Assignment required?” option to “Yes”. This will set up the application to only be accessed by only specific users and groups. After doing the changes, click “Save”.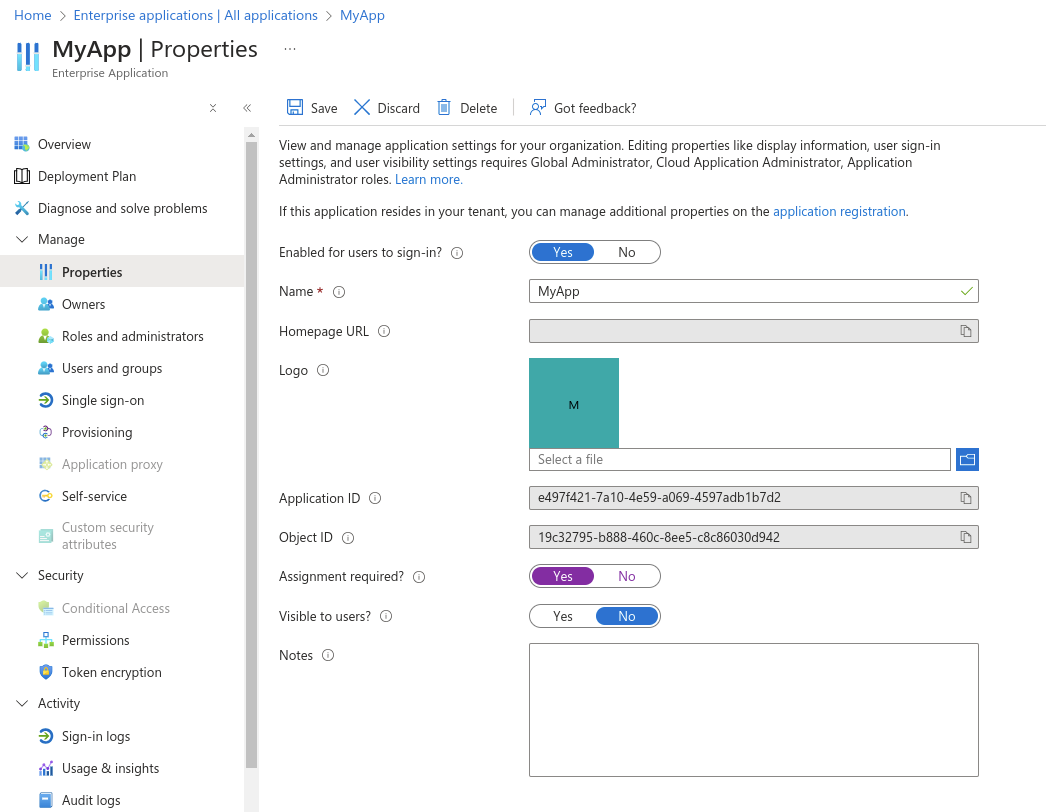
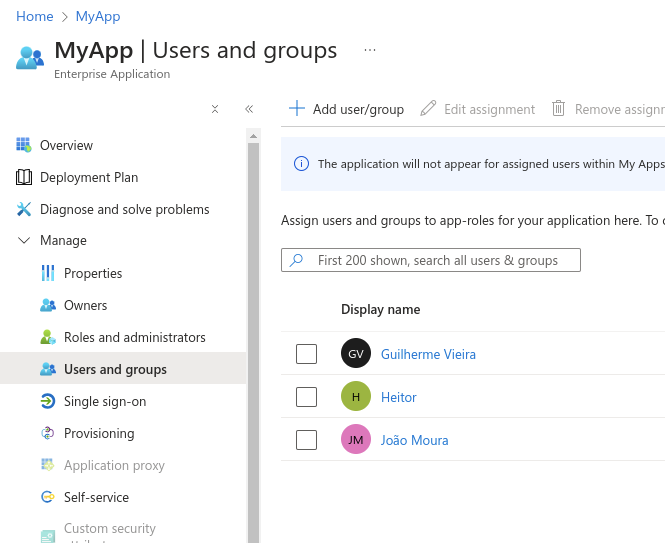
- Regular users → select the Member role
- Admin users → select the Factory Admin role
App Roles are included in the JWT automatically — no additional OAuth scopes are needed. After login, you can verify the token contains the expected
roles claim (e.g. "roles": ["factory-admin"] for admin users).Environment Variables
Application setup in Azure portal is finished. Now, with the credentials obtained in the previous steps, configure them in your Helm values file when deploying the CrewAI enterprise application.Helm Values Configuration
Helm Chart Configuration
The following is a complete, working Helm values snippet with all required Entra ID values in their correct sections:oauth.enabled is NOT required for Entra ID SSO. It controls a separate Built-In Integrations microservice for tool connections (Microsoft 365 Outlook, OneDrive, Teams). If you want those tool integrations, see the Microsoft 365 Integrations guide. Entra ID SSO works without oauth.enabled: true.Combining With Other Features
- Wharf (trace collection): No additional values needed — Wharf is enabled by default. Ensure the
wharfdatabase is pre-created. See Wharf reference. - Studio V2: Configured entirely post-install via the web UI and
kubectl execcommands. See Enable Studio V2. - Microsoft 365 integrations (Outlook, OneDrive, Teams as tools): Requires
oauth.enabled: trueand a separate OAuth app registration. This is separate from Entra ID SSO. See Microsoft Integrations. - ArgoCD / GitOps: Auto-generated secrets must be set explicitly. See the ArgoCD guide.
Optional: Enable CLI Login
This section is only required if you want to use the
crewai CLI tool with Entra ID authentication. If you are only configuring web-based SSO, skip this section. ENTRA_ID_DEVICE_AUTHORIZATION_CLIENT_ID and ENTRA_ID_CUSTOM_OPENID_SCOPE are not needed for web login.This will guide you in the process of updating your Entra ID setup and also the CrewAI Factory installation in order to support login from the CrewAI CLI tool.
Enable Public Client Flows
Now, under “Manage” > “Authentication” we are going to scroll down to “Advanced Settings” and enable the “Allow public client flows” option. This will allow us to use the “device code authorization grant” flow, which is required for native applications such as CLIs. Change it to “Yes” and click “Save”.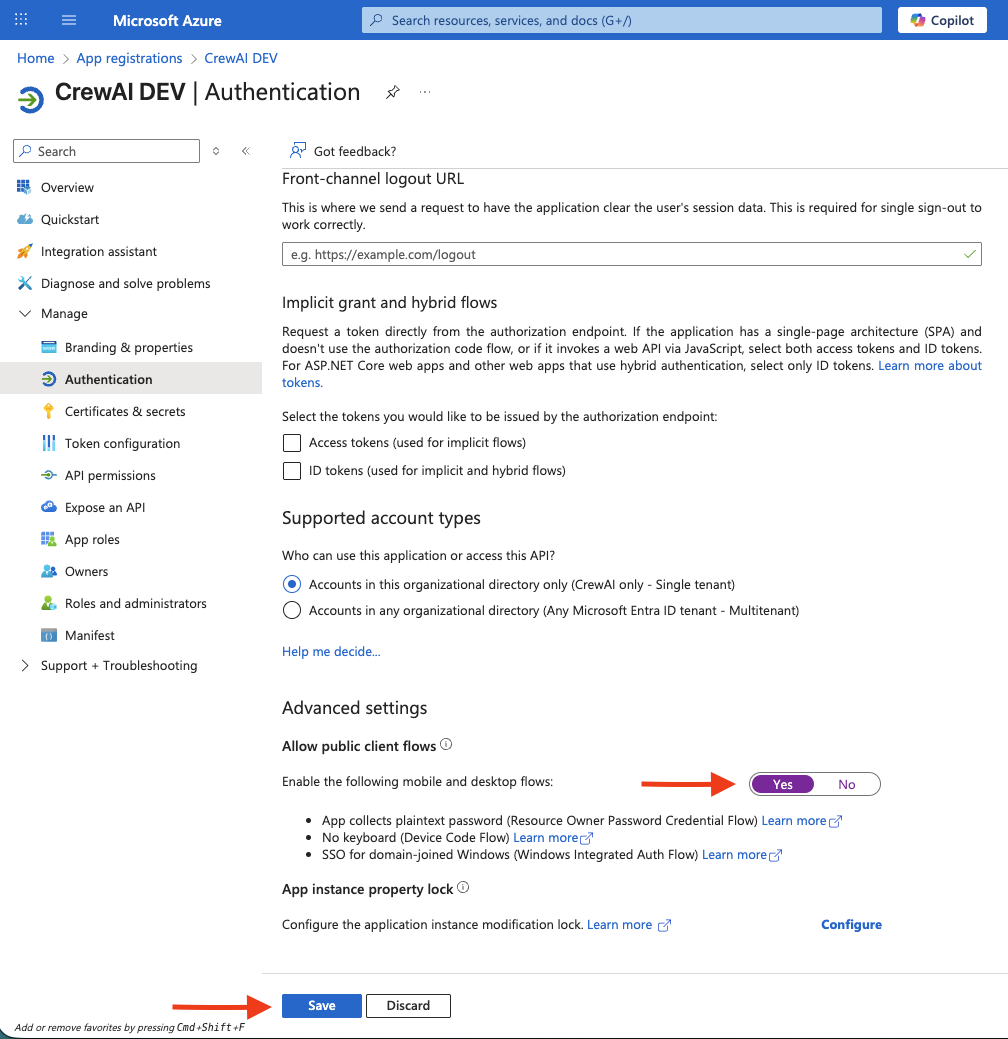
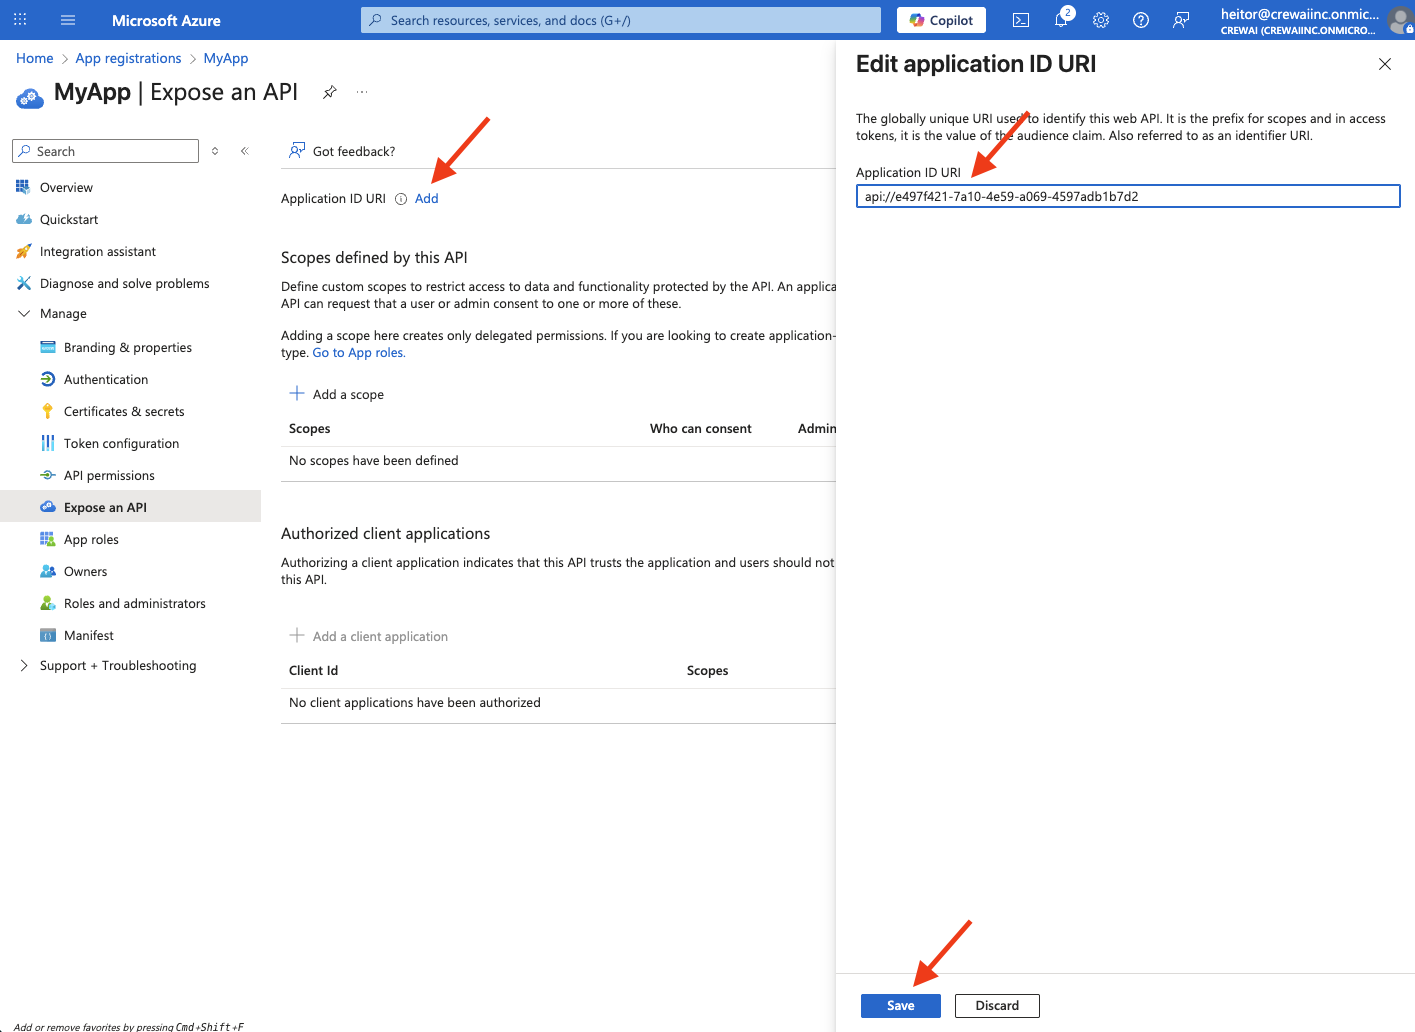
Expose an API
Now, we’ll navigate to “Expose and API” on the left panel, still under “Manage”. There, click on “Add” that is on the side of “Application ID URI” and create the application ID. You can use the default one that is provided or create your own. A good pattern is to start withapi://. After that, click “Save”
read.
Change the “Who can consent?” to “Admins and users”, fill whatever is desired on the display name and description fields, ensure the state is “Enabled” and then click “Add scope”.
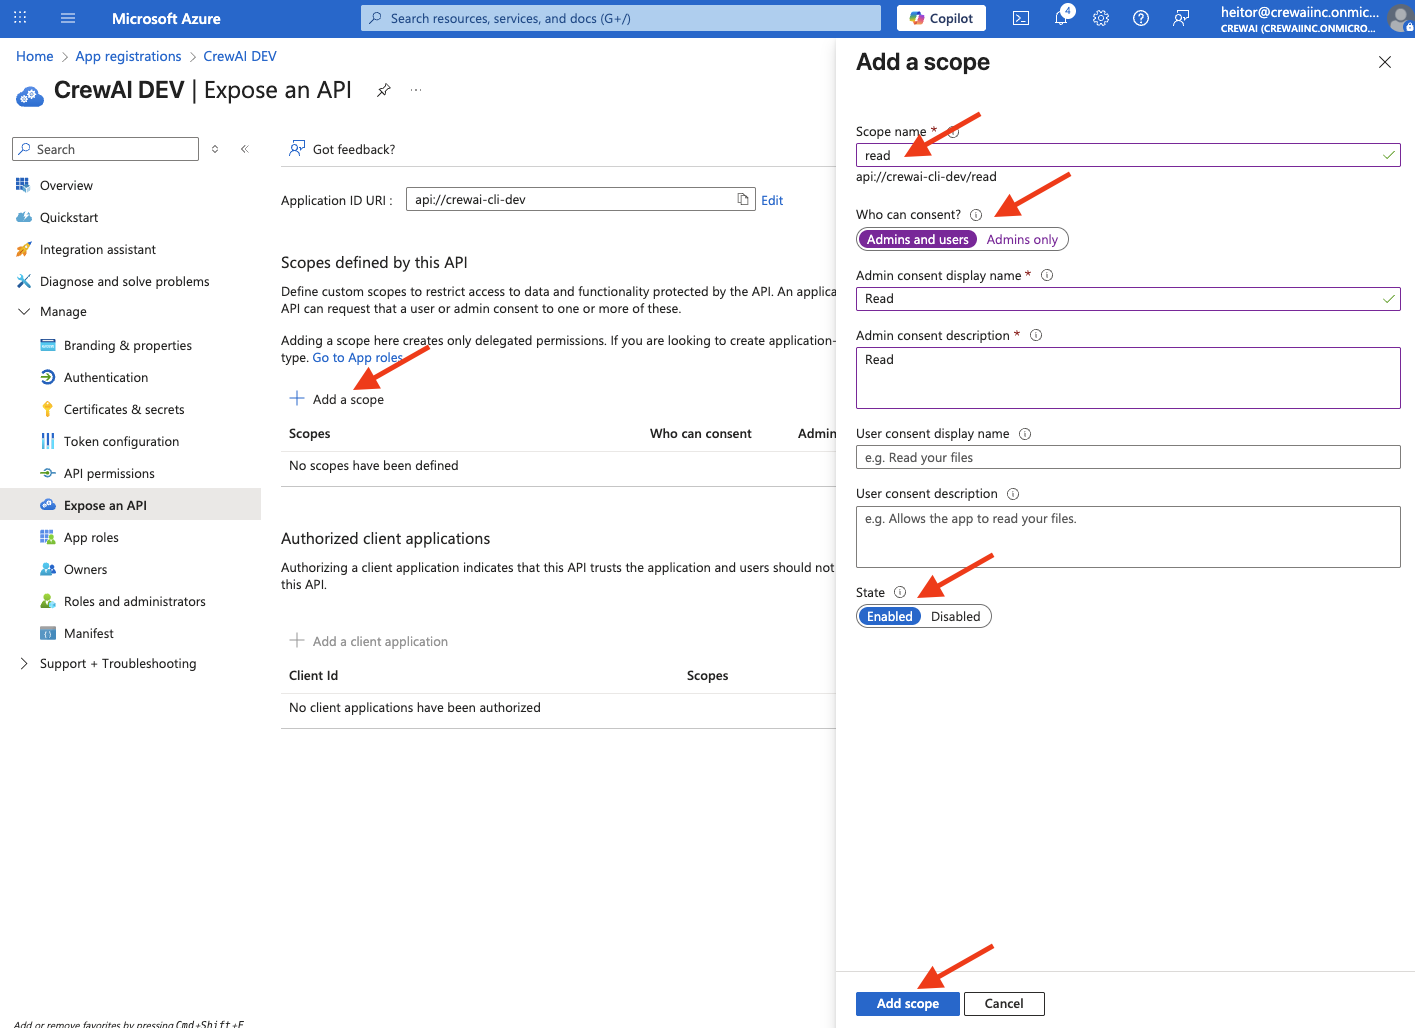
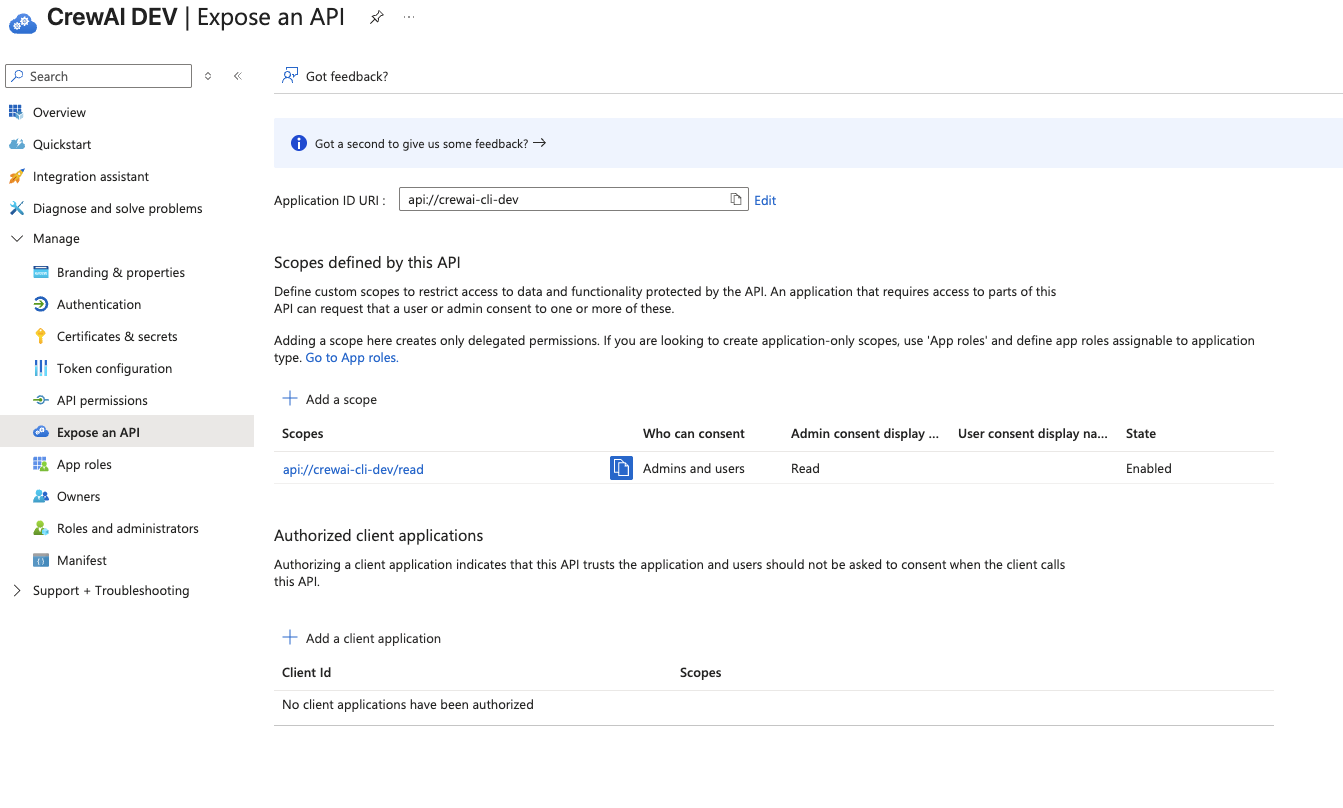
api://crewai-cli-dev/read). It will be used earlier in an environment variable on your Factory Installation.
Update Access Token Version
Now, under “Management” on the left sidebar, navigate to “Manifest”. Search for the configuration namedaccessTokenAcceptedVersion. The value would likely be null, like this:
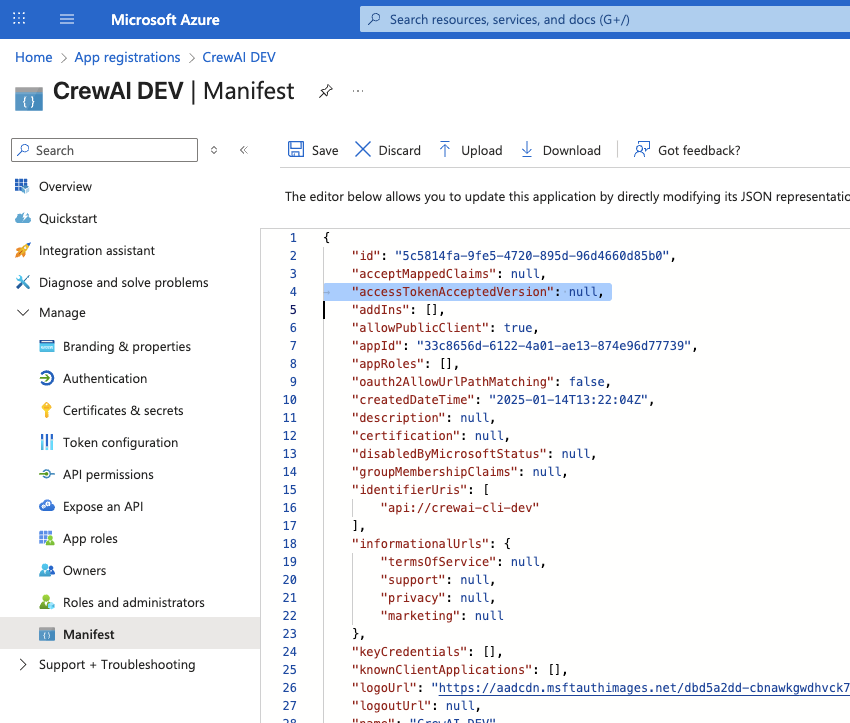
2 and click “Save”.

Additional Environment Variables
Now that Entra ID is configured to allow CLI login, we need to add one extra environment variable to our Factory Installation:CLI Configuration
Now you are ready to configure your enterprise CLI login. Make sure yourcrewai CLI is version 1.6.0 or higher. To configure the Entra ID provider just run the following command: